This project by Lucy AitkenRead appeared in issue #6 of World Sweet World Magazine. Photos by Kate McPherson.
I dream of being able to string up a clothes line from my bedroom window to the ones on the other side; our busy city street transformed into a lazy village lane, our washing waving in the wind like bunting. Sadly, it is not to be – the windows opposite belong to a huge office block and undies flapping about outside is simply not the corporate way.

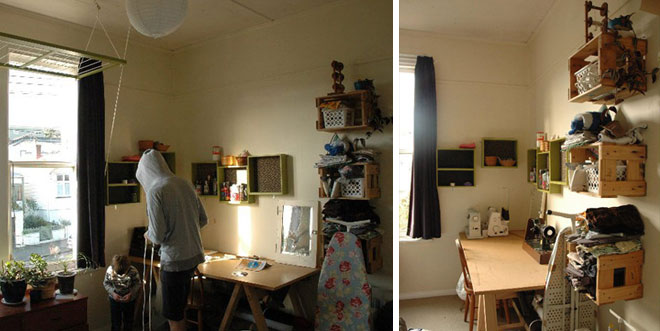
We have had to come up with a less obtrusive way to dry our clothes; the Pulley Drying Rack, not so picturesque but just as old skool. Known in another gender stereotyped life as a Lazy Betty or a Pulley Maid, the Pulley Drying Rack is friend to all who dwell in abodes without gardens and friendly neighbours across the street.


- Work out where you would like your indoor clothesline. Think about roof height, usual temperature of the room, sunshine, and proximity to the washing machine. We chose the
laundry. You’ll be screwing it to the ceiling, so you’ll need to note where the studs are. A stud-finder can help with this, and they’re pretty inexpensive from the hardware store.
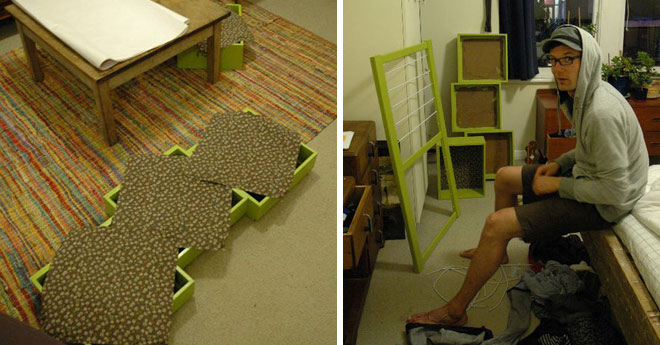
- Dig around at the dump shop or building recyclers for a frame. Think framing in old cupboards or cupboard doors, or even louvred doors (you’d have to cut the louvres out). Look for a sturdy frame that doesn’t weigh too much. Alternatively, if all else fails, grab four lengths of wood and make the frame yourself, using a screw for each corner.
- Evenly space the screw eyes horizontally on the inside along the frame. Pre-drilling with a tiny drill bit makes screwing in the eyes a whole lot easier. Do this on two sides of the frame, making sure the screw eyes are directly opposite each other FIG 1.
- Cut your plastic-coated curtain wire into lengths, about 7cm shorter than the inside width of the frame. Screw a screw hook into each end of each curtain wire (the wire is a bit like a tightly-wound spring, so they’ll screw in, but it’ll be a tight fit). Each curtain wire has to stretch a bit now when you hook it up FIG 2.
- Drill four vertical holes, one on each corner of the frame FIG 3.
- Cut two lengths of rope as long as the width of the frame, add 50% again. These need to be
exactly the same lengths (I’ll call these now the support ropes). In the middle of each of these
support ropes tie in a loop.
- Feed each of the ends through a corner hole that you have just drilled, then tie a gnarly knot on the end so they can’t fit back through. These should form an ‘A’ shape on each end of the frame FIG 4. You now have your main structure sorted, the next is to attach it to the roof!
- In the ceiling you need to find where the cross beams in your roof are located. You need to drill two holes through the ceiling into these crossbeams in order to attach the big hooks. The hooks, and therefore the holes, need to be above the middle of the two ‘A’ frame support ropes. Accurate
positioning is crucial.
- Screw in the big hooks, then hang the pulleys onto them.
- In the same way you found a strong bit to screw in the hooks, now place and attach another hook at waist height on a wall (where the clothesline will eventually be anchored) and the eyelet, or a double pulley, in the junction of the ceiling and wall above this last hook.
- A length of the wax coated rope now needs to be tied to each of the loops in the middle of the support ropes. These lengths of rope will both individually go up, through the appropriate
pulley, then together pass through the big eyelet, then be tied off together in two positions FIG 5. Firstly, the longest part, where the lowered clothesline will sit when you are hanging up the washing, and secondly, a knot further up the rope, where the clothesline will be anchored when it is pulled up close to the ceiling.
Every so often make sure the anchor hooks and eyelets are all still secure and safe. When it comes to drying clothes this rack is a life saver but it would knock you for six if it dropped on your head. Eek.
An extra benefit of this drying rack is that we have all become arm wrestling champions since having to heave it up and down on a regular basis. Seriously though, if we were to do this again we’d tee up some sort of counter weight system so it’s less of a strain to pull up when laden with wet clothes. If you’re not up to that task, just make a smaller rack.
